Search This Blog

Sunday, December 26, 2010

Christmas Stollen Wreath


The 2010 December Daring Bakers’ challenge was hosted by Penny of Sweet Sadie’s Baking. She chose to challenge Daring Bakers’ to make Stollen. She adapted a friend’s family recipe and combined it with information from friends, techniques from Peter Reinhart’s book.........and Martha Stewart’s demonstration.


I really loved this challange. Being from the USA, I, as others do not like fruitcake. I wanted to embrace this traditional food from Germany though. I looked at the candied citron at the grocery store and I think that may be the offender why so many Americans dislike fruitcake so I made my own citron and my Stollen was amazing! I hope to have time to make many next year and give them as gifts.


Candied Citron Recipe
Filed under: Delicious Bite, Tagged as: citron, delicious bite, delicious bites, recipes
Here's how you can candy citron (and by the way, it works for other citrus as well):
Grate moist citron peel to release the oil from the cells. Cut the peel into thin strips and place in a heavy pan: Use 2 cups of citron peel.
Cover with 1½ cups (360 mL) of cold water. Bring slowly to a boil then simmer for 10 minutes or longer to dim the acidy taste.
Drain and repeat this process 3 to 5 times, draining well each time.
For each cup of peel, make syrup of ¼ cup (60 mL) of water and ½ cup (120 mL) of sugar.
Add the peel and boil until the peel absorbs all of the syr
up. The peel will become transparent.
Roll the peel in powdered sugar and spread on a rack to dry.
When thoroughly dried, store in a tight container.


Stollen Wreath
Makes one large wreath or two traditional shaped Stollen loaves. Serves 10-12 people
Ingredients
¼ cup (60ml) lukewarm water (110º F / 43º C)
2 packages (4 1/2 teaspoons) (22 ml) (14 grams) (1/2 oz) active dry yeast 1 cup (240 ml) milk
10 tablespoons (150 ml) (140 grams) unsalted butter (can use salted butter)
5½ cups (1320 ml) (27 ozs) (770 grams) all-purpose (plain) flour (Measure flour first - then sift- plus extra for dusting)
½ cup (120 ml) (115 gms) sugar
¾ teaspoon (3 ¾ ml) (4 ½ grams) salt (if using salted butter there is no need to alter this salt measurement)
1 teaspoon (5 ml) (6 grams) cinnamon
3 large eggs, lightly beaten
Grated zest of 1 lemon and 1 orange
2 teaspoons (10 ml) (very good) vanilla extract
1 teaspoon (5 ml) lemon extract or orange extract
¾ cup (180 ml) (4 ¾ ozs) (135 grams) mixed peel (link below to make your own)
1 cup (240 ml) (6 ozs) (170 gms) firmly packed raisins
3 tablespoons (45ml) rum
12 red glacé cherries (roughly chopped) for the color and the taste. (optional)
1 cup (240 ml) (3 ½ ozs) (100 grams) flaked almonds
Melted unsalted butter for coating the wreath
Confectioners’ (icing) (powdered) sugar for dusting wreath
Note: If you don’t want to use alcohol, double the lemon or orange extract or you could use the juice from the zested orange.
Directions:
Soak the raisins
In a small bowl, soak the raisins in the rum (or in the orange juice from the zested orange) and set aside.

To make the dough
Pour ¼ cup (60 ml) warm water into a small bowl, sprinkle with yeast and let stand 5 minutes. Stir to dissolve yeast completely.
In a small saucepan, combine 1 cup (240 ml) milk and 10 tablespoons (150 ml) butter over medium - low heat until butter is melted. Let stand until lukewarm, about 5 minutes.
Lightly beat eggs in a small bowl and add lemon and vanilla extracts.
In a large mixing bowl (4 qt) (4 liters) (or in the bowl of an electric mixer with paddle attachment), stir together the flour, sugar, salt, cinnamon, orange and lemon zests.
Then stir in (or mix on low speed with the paddle attachment) the yeast/water mixture, eggs and the lukewarm milk/butter mixture. This should take about 2 minutes. It should be a soft, but not sticky ball. When the dough comes together, cover the bowl with either plastic or a tea cloth and let rest for 10 minutes.
Add in the mixed peel, soaked fruit and almonds and mix with your hands or on low speed to incorporate. Here is where you can add the cherries if you would like. Be delicate with the cherries or all your dough will turn red!
Sprinkle flour on the counter, transfer the dough to the counter, and begin kneading (or mixing with the dough hook) to distribute the fruit evenly, adding additional flour if needed. The dough should be soft and satiny, tacky but not sticky. Knead for approximately 8 minutes (6 minutes by machine). The full six minutes of kneading is needed to distribute the dried fruit and other ingredients and to make the dough have a reasonable bread-dough consistency. You can tell when the dough is kneaded enough – a few raisins will start to fall off the dough onto the counter because at the beginning of the kneading process the dough is very sticky and the raisins will be held into the dough but when the dough is done it is tacky which isn't enough to bind the outside raisins onto the dough ball.
Lightly oil a large bowl and transfer the dough to the bowl, rolling around to coat it with the oil. Cover the bowl with plastic wrap.
Put it in the fridge overnight. The dough becomes very firm in the fridge (since the butter goes firm) but it does rise slowly… the raw dough can be kept in the refrigerator up to a week and then baked on the day you want.
Shaping the Dough and Baking the Wreath
1. Let the dough rest for 2 hours after taking out of the fridge in order to warm slightly.
2. Line a sheet pan with parchment paper.
3. Preheat oven to moderate 350°F/180°C/gas mark 4 with the oven rack on the middle shelf.
4. Punch dough down, roll into a rectangle about 16 x 24 inches (40 x 61 cms) and ¼ inch (6 mm) thick.

Starting with a long side, roll up tightly, forming a long, thin cylinder.


Transfer the cylinder roll to the sheet pan. Join the ends together, trying to overlap the layers to make the seam stronger and pinch with your fingers to make it stick, forming a large circle. You can form it around a bowl to keep the shape.

Using kitchen scissors, make cuts along outside of circle, in 2-inch (5 cm) intervals, cutting 2/3 of the way through the dough.

Twist each segment outward, forming a wreath shape. Mist the dough with spray oil and cover loosely with plastic wrap

Proof for approximately 2 hours at room temperature, or until about 1½ times its original size.
Bake the stollen for 20 minutes, then rotate the pan 180 degrees for even baking and continue to bake for 20 to 30 minutes. Bake at 350F. The bread will bake to a dark mahogany color, should register 190°F/88°C in the center of the loaf, and should sound hollow when thumped on the bottom.
Transfer to a cooling rack and brush the top with melted butter while still hot.
Immediately tap a layer of powdered sugar over the top through a sieve or sifter.
Wait for 1 minute, then tap another layer over the first.
The bread should be coated generously with the powdered sugar.
Let cool at least an hour before serving. Coat the stollen in butter and icing sugar three times, since this many coatings helps keeps the stollen fresh - especially if you intend on sending it in the mail as Christmas presents!
When completely cool, store in a plastic bag. Or leave it out uncovered overnight to dry out slightly, German style,

Christmas Cookies

I made a few Christmas Cookie's Platters this year!!! All cookies are from scratch and use real butter.


The cookies below were given to me as a gift from Sue aka the Cookie Diva. She has been my inspiration for making all these cookies platters. She bakes about 3000 cookies every season and as you can see from her cookies there are so many varieties! They taste amazing!


Sunday, December 19, 2010

Kahula Caramel Cheesecake


Here is a Kaluha Caramel Cheesecake that I made for my Husband Tom for his potluck at work. This is my most popular flavor that I make. I love the story of how I came about it. Years ago, back in 1993 I quit my full time job and took my first bakery job for $7.50 an hour for a part time job to pay for grocery's. I was a Mom now and decided to not put my precious baby into daycare so I took a HUGE paycut and worked in a bakery. I started making cheesecakes at work and they started to sell. I was working at the once famous Oven's of Brittany on State St. So my boss told me to take home ingredients and develope new flavors. I had some bombs but this was the home run. We went on to win an Isthmus Madison Best award for our bakery and this cheesecake recipe won the Wisconsin Chamber Orchestra Chocolate Gala Best Cheesecake in Madison for 5 years in a row!!!!
This cheesecake has a pecan caramel shortbread crust with a layer of caramel on top of the crust. A rich cheesecake filling with chocolate and caramel and kaluha swirled throughout. Then on the top, is chocolate ganache, pecans and caramel.

Saturday, December 11, 2010

Pampered Chef Cookie Exchange


Here is a platter of cookies we created at my Pampered Chef cookie exchange. It was alot of fun! Thank you everyone for coming.

Sunday, December 5, 2010

Gloria's Funeral Cake


This cake was made for one of my best friends. She was not a big fan of chocolate so I made what she liked. The cake is an orange sour cream cake. I made a filling of cranberry curd with fresh cranberries. I frosted the cake with italian buttercream.
I am still in shock of all this but Gloria....I can't wait to see you again!

Saturday, November 27, 2010

Crostata Con La Crema


•The 2010 November Daring Bakers’ challenge was hosted by Simona of briciole. She chose to challenge Daring Bakers’ to make pasta frolla for a crostata. She used her own experience as a source, as well as information from Pellegrino Artusi’s Science in the Kitchen and the Art of Eating Well.

I loved this challange. The tart dough is amazing-it is going to become my new standard recipe. The pastry cream was so simple and fuss free. If you scroll down, read the story of the pastry cream recipe-it is so touching. I love hearing how recipes and foods bring back memories of times past and how a long lost love one can stay alive in our day to day through the recipes and training they they leave behind to their young families. True Inspiration comes in the celebration when special loved ones family recipes are prepared for special occassions.
PASTA FROLLA

1/2 c. minus 1 tablespoon [105 ml, 100 g, 3 ½ oz] superfine sugar (see Note 1) or a scant 3/4 cup [180ml, 90g, 3 oz] of powdered sugar
• 1 and 3/4 cup [420 ml, 235 g, 8 1/4 oz.] unbleached all-purpose flour
• a pinch of salt
• 1 stick [8 tablespoons / 4 oz. / 115 g] cold unsalted butter, cut into small pieces
• grated zest of half a lemon (you could also use vanilla sugar as an option, see Note 2)
• 1 large egg and 1 large egg yolk, lightly beaten in a small bowl
Note 1: Superfine sugar is often also referred to as ultrafine, baker’s sugar or caster sugar. It’s available in most supermarkets. If you cannot find “superfine” sugar, you can make your own by putting some regular granulated sugar in a food processor or blender and letting it run until the sugar is finely ground.
Note 2: There are different ways of making vanilla sugar. I keep vanilla beans in a jar half-filled with sugar until I need to use them, for example, to make vanilla ice cream. After I remove the split bean from the custard that will go into the ice cream maker, I rinse it, dry it and put it back in the jar with sugar.
Making pasta frolla by hand:
1. Whisk together sugar, flour and salt in a bowl.
2. Rub or cut the butter into the flour until the mixture has the consistency of coarse crumbs. You can do this in the bowl or on your work surface, using your fingertips or an implement of choice.

3. Make a well in the center of the mounded flour and butter mixture and pour the beaten eggs into it (reserve about a teaspoon of the egg mixture for glazing purposes later on – place in the refrigerator, covered, until ready to use).
4. Add the lemon zest to your flour/butter/egg mixture.
5. Use a fork to incorporate the liquid into the solid ingredients, and then use your fingertips.
6. Knead lightly just until the dough comes together into a ball.
7. Shape the dough into a flat disk and wrap in plastic wrap. Place the dough in the refrigerator and chill for at least two hours. You can refrigerate the dough overnight.

crema pasticcera di zia Lucia
pastry cream à la aunt Lucia

ITALIAN PASTRY CREAM

Zia Lucia passed away five years ago this week. She never married and lived all her life in Poggio Catino, a village in central Italy, in the house where she and all her siblings, among them my father, were born and grew up.
In my childhood and adolescence, she played the role of Fairy Godmother, knitting, sewing and cooking for me pretty much whatever I fancied. She taught me to make crema pasticcera, as a way of making me consume fresh (raw) milk, which I did not like to drink by itself. For decades, that was pretty much the only thing I could make in the kitchen, in the sense of both knowing how to make it and being allowed by my mother to make it in her kitchen.
When I made crema under my aunt's direction, I would pour it in my special gold-rimmed china bowl and carry it to the dispensa, a walk-in pantry located in the coolest part of the house. The dispensa was a special cabinet of curiosities. My aunt made different kinds of jam, fruit in syrup, and giardiniera (pickled vegetable medley). She used ancient-looking glass jars to preserve fresh sausages in olive oil (salsicce sott'olio), let grapes dry into raisins and hung braids of garlic from nails hammered on the edge of the top shelf.
When mid-afternoon came around I retrieved my bowl of crema from the dispensa. Sometimes my aunt scattered on the smooth sunny surface some of her deep purple amarene sotto spirito (sour cherries preserved in alcohol) and I would eat my crema while sitting on the front steps of the house, basking in the sun, surrounded by her pots of hydrangeas, fuchsias and dahlias. I know that my aunt's happiness in life was seeing me so completely content.
I didn't get to say farewell to my aunt. And I didn't get to ask her for her recipes for a long list of goodies she would make for her brothers and their families, when they visited her and for special occasions, like Christmas and Easter. I have decided that, instead of spending my energy regretting something I cannot change, I will invest it into improving my cooking skills.
Here is my recipe for crema pasticcera, derived from my aunt's instructions. I no longer eat a bowl of crema for my afternoon snack. I usually make it as filling for crostata, using the ingredients listed below. Last summer I shared the recipe with Paz of The Cooking Adventures of Chef Paz and she honored me by using it to make a special anniversary dessert.
Ingredients:
• 2 extra-large eggs [see Notes below on alternatives]
• 1/3 cup sugar (65 g) [see Notes below on sweetness level]
• 500 ml milk (slightly more than 2 cups) [see Notes below on milk options]
• 3 strips of lemon peel about 3" long and 1/2" wide (using a potato peeler to cut the strips makes it easier to avoid cutting the white part of the lemon) [see Notes below on alternatives]
• 3 tablespoons pastry (or unbleached regular) flour (25 g) [see Notes below on alternatives]
Pour the milk into a pan, add the lemon peel and warm up to to well below boiling point. In a mixing bowl, beat the eggs with the sugar until the mixture is bubbly. Sift the flour over the egg mixture and beat briefly until it is incorporated. Temper the egg mixture with a small quantity of milk, then slowly add the rest of the milk, mixing with a wooden spoon. Pour the mixture into the pan and set it to very low heat, stirring at least every couple of minutes. When the froth on the surface disappears completely, the crema starts to feel slightly thicker. From then on stir almost continuously. When the crema reaches boiling temperature and thickens, cook briefly (1-2 minutes), then remove the pan from the heat, remove the lemon peel, place the saucepan in a cold water bath, and stir the crema to bring down its temperature. While the crema cools down, stir it every now and then to prevent the formation of a film over it.
I remember my aunt telling me that the crema should not boil, but according to Harold McGee, it must do so. In the recipe, the addition of flour has the objective of making the crema able to hold its shape. As McGee explains in his book "On Food and Cooking," cream fillings (to which category crema pasticcera belongs) must be boiled in order to get the desired effect, because, "egg yolks contain a starch-digesting enzyme, amylase, that is remarkably resistant to heat," and, unless neutralized, will "digest the starch and turn the stiff cream into a pourable one" (page 98).
Notes
• When I have leftover yolks, I use 1 egg and 2 yolks, or 4 yolks. Using all yolks makes a more traditional crema pasticcera. The crema in the photo above was made with 4 yolks that came from having made another batch of the exquisite chiffon cake from last month Daring Bakers' challenge. My aunt's version is lighter in color and texture.
• My crema is not very sweet. You can certainly add more sugar.
• I have made crema using whole milk and also lower fat alternatives (including non-fat milk). However, I have never tried to use a milk-substitute.
• I sometimes use vanilla sugar instead of regular sugar. You can also make a vanilla-flavored crema, by infusing a piece of vanilla bean split in half lengthwise, in the heated milk for an hour or so before using it.
• There are many recipes for crema, and some use different types of starch, like wheat starch and corn starch. I have never tried using them. The higher the amount of starch, the thicker the crema. Keep in mind though that crema thickens a bit as it cools.
• When I made crema with my aunt, I used one egg and 250 ml (a cup) of milk. I sometimes make the same amount (for various uses), in which case the amount of sugar is 3 tablespoons (33 g), the amount of flour is 1 1/2 tablespoons (12 g) and the amount of lemon strip is half the one specified above.

Thanksgiving Pies


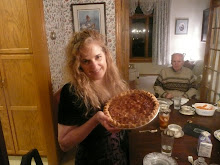
I made 11 pies this Thanksgiving holiday, 8 of which I gave away as gifts. I made all my crust from scratch. The flavors I made were Pumpkin, Pecan, Caramel Apple and Caramel Apple Walnut.

The big secret to share is that when making apple pies, freeze your apples first. The pie will be juicy with frozen apples, trust me!!


Fill the crust half way with apple filling then drizzle caramel on top and optional, add walnuts.
Fill the remaining apple filling into the crust and drizzle more caramel and optional walnuts.
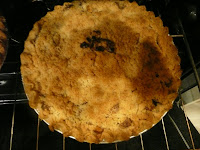


Top with strusel and if there are walnuts in the pie put a

few nuts onto to mark the pies.


Wednesday, October 27, 2010

Doughnuts


The October 2010 Daring Bakers challenge was hosted by Lori of Butter Me Up. Lori chose to challenge DBers to make doughnuts. She used several sources for her recipes including A.lton Brown, Nancy Silverton, Kate Neumann and Epicurious
I made yeast and cake doughnuts. The pictures are from 3 different doughnut frying sessions. For the jelly doughnut I used the daring bakers training from Orange Tian and made homemade jam. I love making doughnuts!!!


Yeast Doughnuts:
Preparation time:
Hands on prep time - 25 minutes
Rising time - 1.5 hours total
Cooking time - 12 minutes
Yield: 20 to 25 doughnuts & 20 to 25 doughnut holes, depending on size
Ingredients
Milk 1.5 cup / 360 ml
Vegetable Shortening 1/3 cup / 80 ml / 70 gm / 2.5 oz (can substitute butter, margarine or lard)
Active Dry Yeast 4.5 teaspoon (2 pkgs.) / 22.5 ml / 14 gm / ½ oz
Warm Water 1/3 cup / 80 ml (95°F to 105°F / 35°C to 41°C)
Eggs, Large, beaten 2
White Granulated Sugar ¼ cup / 60 ml / 55 gm / 2 oz
Table Salt 1.5 teaspoon / 7.5 ml / 9 gm / 1/3 oz
Nutmeg, grated 1 tsp. / 5 ml / 6 gm / ¼ oz
All Purpose Flour 4 2/3 cup / 1,120 ml / 650 gm / 23 oz + extra for dusting surface
Canola Oil DEPENDS on size of vessel you are frying in – you want THREE (3) inches of oil (can substitute any flavorless oil used for frying)
Directions:
1. Place the milk in a medium saucepan and heat over medium heat just until warm enough to melt the shortening. (Make sure the shortening is melted so that it incorporates well into the batter.)
2. Place the shortening in a bowl and pour warmed milk over. Set aside.
3. In a small bowl, sprinkle the yeast over the warm water and let dissolve for 5 minutes. It should get foamy. After 5 minutes, pour the yeast mixture into the large bowl of a stand mixer and add the milk and shortening mixture, first making sure the milk and shortening mixture has cooled to lukewarm.
4. Add the eggs, sugar, salt, nutmeg, and half of the flour. Using the paddle attachment of your mixer (if you have one), combine the ingredients on low speed until flour is incorporated and then turn the speed up to medium and beat until well combined.
5. Add the remaining flour, combining on low speed at first, and then increase the speed to medium and beat well.
6. Change to the dough hook attachment of the mixer and beat on medium speed until the dough pulls away from the bowl and becomes smooth, approximately 3 to 4 minutes (for me this only took about two minutes). If you do not have a dough hook/stand mixer – knead until the dough is smooth and not sticky.
7. Transfer to a well-oiled bowl, cover, and let rise for 1 hour or until doubled in size.
8. On a well-floured surface, roll out dough to 3/8-inch (9 mm)thick. (Make sure the surface really is well-floured otherwise your doughnuts will stick to the counter).
9. Cut out dough using a 2 1/2-inch (65 mm) doughnut cutter or pastry ring or drinking glass and using a 7/8-inch (22 mm) ring for the center whole. Set on floured baking sheet, cover lightly with a tea towel, and let rise for 30 minutes.
10. Preheat the oil in a deep fryer or Dutch oven to 365 °F/185°C.
11. Gently place the doughnuts into the oil, 3 to 4 at a time. Cook for 1 minute per side or until golden brown (my doughnuts only took about 30 seconds on each side at this temperature).
12. Transfer to a cooling rack placed in baking pan. Allow to cool for 15 to 20 minutes prior to glazing, if desired.


Old-Fashioned Buttermilk Cake Doughnuts:
Preparation time:
Hands on prep time - 25 minutes
Cooking time - 12 minutes
Yield: About 15 doughnuts & 15 doughnut holes, depending on size
Ingredients
Sour Cream ¼ cup / 60 ml / 60 gm / 2 oz
All Purpose Flour 3 ¼ cup / 780 ml / 455 gm / 16 oz + extra for dusting surface
White Granulated Sugar ¾ cup / 180 ml / 170 gm / 6 oz
Baking Soda ½ teaspoon / 2.5 ml / 3 gm / .1 oz
Baking Powder 1 teaspoon / 5 ml / 6 gm / .2 oz
Kosher (Flaked) Salt 1 teaspoon / 5 ml / 6 gm / .2 oz (If using table salt, only use ½ teaspoon)
Nutmeg, grated 1.5 teaspoon / 7.5 ml / 9 gm / .3 oz
Active Dry Yeast 1 1/8 teaspoon / 5.6 ml / 3.5 gm / .125 oz
Buttermilk ¾ cup + 2 Tablespoon / 210 ml / 225 gm / 7 ¾ oz
Egg, Large 1
Egg Yolk, Large 2
Pure Vanilla Extract 1 Tablespoon / 15 ml
Powdered (Icing) Sugar ¼ cup / 120 ml / 65 gm / 2.3 oz (Used for decorating and is optional)

Directions:
1. In a small stainless-steel bowl set over a pot of gently simmering water, heat the sour cream until just warm.
2. Heat the oil to 375°F/190°C.
3. Over a large mixing bowl, sift together the flour, sugar, baking soda, baking powder, salt, nutmeg; make a large well in the center. Place the yeast in the well; pour the sour cream over it. Allow it to soften (if using packed fresh yeast), about 1 minute.
4. Pour the buttermilk, whole egg, egg yolks, and vanilla extract into the well. Using one hand, gradually draw in the dry ingredients. The mixture should be fairly smooth before you draw in more flour. Mix until it is completely incorporated. The dough will be very sticky. Wash and dry your hands and dust them with flour.
5. Sift an even layer of flour onto a work surface. Don’t be afraid to use a lot of flour. You don’t want the doughnuts sticking to your counter. Scrape dough out of bowl onto the surface; sift another layer of flour over dough. Working quickly, pat dough into an even 1/2-inch (12.5 mm) thickness. Dip cutter in flour and, cutting as closely together as possible, cut out the doughnuts and holes. Place holes and doughnuts on a floured surface. Working quickly, gather scraps of dough together, pat into 1/2-inch (12.5 mm) thickness, and cut out remaining doughnuts and holes.
6. Drop three to four doughnuts at a time into the hot oil. Once they turn golden brown, turn them and cook the other side. Cooking times may vary, but with my oil at 375 °F/190°C, I found they only took about 20 to 30 seconds per side.
7. Once cooked, place on a baking sheet covered with paper towels to drain.
Sift powdered sugar over doughnuts and serve.