Search This Blog

Wednesday, August 1, 2012

Android Ice Cream Sandwich


The above picture was taken with the new android ice cream sandwich phone.

My son had asked for a bunch of space alien shaped gingerbread cookies for his birthday but 2 weeks ago he told me he had to upgrade his birthday treat for a giant ice cream sandwich.
Ice Cream Sandwiches Recipe:
1/2 cup (113 grams) unsalted buttermelted
1/2 cup (100 grams) white granulated sugar
1 large egg
1 teaspoon pure vanilla extract
1/2 cup (65 grams) all purpose flour
1/4 cup (25 grams) unsweetened cocoa powder
1/4 teaspoon salt
4 cups (2 pints) (950 ml) Ice Cream (any flavor) (Homemade or Store Bought), slightly softened
Melt the butter then add sugar, eggs and vanilla and whisk.  Next add all the dry and whisk.  Spread on a pan and bake approx. 20 minutes rotating after 10 minutes.  Let cool and cut in half then trim to put it in a cake pan.
 Be sure to put a big piece of plastic wrap in the pan before building the ice cream sandwich.  Put one half of the sandwich in the pan then add the ice cream slightly softened.
Smooth the ice cream then add the top piece of the sandwich.  Wrap the cake up and put it inte freezer.  Once the ice cream has frozen take out to decorate.

To get the android color I used the following 3 shades of green and kept adding to the frosting until I got the desired color.

I decorated the cake in the pan then removed it taking the plastic wrap off.


Monday, July 2, 2012

Battenberg

 Mandy of What The Fruitcake?! came to our rescue last minute to present us with the Battenberg Cake challenge! She highlighted Mary Berry’s techniques and recipes to allow us to create this unique little cake with ease.

This cake is in honor of the Queen of Englands Jubilee.  I had never heard of this before but that is what I love about being a daring baker.  I learn from bakers all around the world.  Maybe you would like to become a daring baker.  Check it out  http://www.thedaringkitchen.com

For my Battenberg I used blueberry jam instead of apricot.  I covered my Battenberg with marzipan.
 Ingredients¾ cup (1½ sticks) 175gm / 6 oz Unsalted Butter, softened & cut in cubes
¾ cup / 175gm / 6 oz Caster Sugar
1¼ cups / 175gm / 6 oz Self-Raising Flour (***see end of doc on how to make your own)
3 Large Eggs, room temp
½ cup / 65gm/ 2 1/3 oz Ground Almonds (Can be substituted with ground rice)
3/4 tsp / 3½ gm Baking Powder
½ tsp / 2½ ml Vanilla Extract
1/4 tsp (1¼ ml) Almond Extract
Red Food Colouring, paste, liquid or gel
 Directions:1. Preheat oven to moderate 350°F/180°C/160°C Fan Assisted/Gas Mark 4
2. Grease an 8”/20cm square baking tin with butter
3. Line the tin with parchment paper, creating a divide in the middle with the parchment (or foil)
- Tip: See photos or watch video above for detailed instructions
4. OR Prepare Battenberg tin by brushing the tin with melted butter and flouring
5. Whisk together the dry ingredients then combine with the wet ingredients in a large bowl and beat together just until the ingredients are combined and the batter is smooth
6. Spoon half the mixture into the one side of the prepared baking tin
7. Add a few drops of red food liquid/gel/paste to the remaining batter, stir until the colour is thoroughly distributed, add more colour if needed
8. Spoon the pink batter into the other half of the prepared baking tin
9. Smooth the surface of the batter with a spatula, making sure batter is in each corner
10. Bake for 25-30mins until the cake is well risen, springs back when lightly touched and a toothpick comes out clean (it should shrink away from the sides of the pan)
11. Leave to cool in the tin for a few minutes before turning out to cool thoroughly on a wire rack
12. Once completely cool, trim the edges of the cake with a long serrated knife
13. Cut each coloured sponge in half lengthways so that you are left with four long strips of sponge


 14. Neaten the strips and trim as necessary so that your checkered pattern is as neat and even as possible
15. Gently heat the apricot jam and pass through a small sieve

16. Brush warmed jam onto the strips of cake to stick the cake together in a checkered pattern (one yellow next to one pink. On top of that, one pink next to one yellow)
- Tip: See photos for detailed instructions
17. Dust a large flat surface with icing sugar then roll the marzipan in an oblong shape that is wide enough to cover the length of the cake and long enough to completely wrap the cake
18. Brush the top of the cake with apricot jam
19. Place the cake on the marzipan, jam side down
- Tip: Either in the middle or to the one side of the marzipan
20. Brush the remaining three sides with jam
21. Press the marzipan around the cake, making sure the join is either neatly in the one corner, or will be underneath the cake once turned over
- Tip: If you put the sponge to the one side of the marzipan, I found it easiest to "roll" the sponge over and over onto the marzipan instead of lifting the marzipan up onto the sponge
22. Carefully flip the cake over so that the seam is under the cake and score the top of the cake with a knife, you can also crimp the top corners with your fingers to decorate
23. Neaten the ends of the cake and remove excess marzipan by trimming off a small bit of cake on both ends to reveal the pattern
.


Saturday, June 2, 2012

Patrice Baby Shower Cake


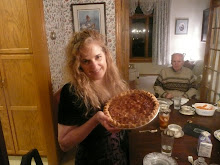
     This is a baby shower cake for my friend Patrice.  It is my first attempt at doing fondant covered cakes!!  What is special about this cake is the flavor.  It is a scratch made Peruvian Black Cake.  Several years ago Patrice had me do her wedding cake which is pictured.  In Peru the cakes have ribbons all over and one ribbon has a ring attached to it.  During the reception all the single ladies come up and grab hold of a ribbon and at the count of 3 they all pull a ribbon out and who ever has the ring attached to their ribbon is the next to be married.  Very much like the United States tradition of tossing the bouquet.

     The cake is an original recipe I invented for Patrice.  It took weeks of research to do this recipe as I could not find one on the internet.  Patrice gave me permission to give out the recipe so I will make it again soon and get the recipe posted with the instructions.  It takes minimum of 2 days to bake this cake due to other preparations.

Thursday, May 31, 2012

Whole Wheat Challah Bread


   May’s Daring Bakers’ Challenge was pretty twisted – Ruth from The Crafts of Mommyhood challenged us to make challah! Using recipes from all over, and tips from “A Taste of Challah,” by Tamar Ansh, she encouraged us to bake beautifully braided breads.

I love that this recipe has whole wheat and oats in it.  I love the excitement when bread comes out of the oven and looks this good!!

Ingredients
2 (.25 oz.) packages (4½ teaspoons) (22½ ml) (15 gm) (½ oz) dry yeast
1 cup (240 ml) warm water (100°F/38°C)
½ cup (120 ml) (100 gm) (3½ oz) brown sugar, firmly packed
½ cup (one stick) (120 ml) (115 gm/4 oz) margarine or unsalted butter – room temperature
2 tsp. (10 ml) (15 gm) (½ oz) salt
3 large eggs
2 cups (480 ml) (280 gm/10 oz) whole wheat flour
2 cups (480 ml) (280 gm/10 oz) all-purpose flour
½ cup (120 ml) (50 gm) (1¾ oz) rolled oats (Old Fashioned work just fine!)
Additional flour for kneading (½ to 1 cup) (120 to 240 ml) (70 to 140 gm) (2½ to 5 oz)
1 egg beaten with 1 tsp. water for glaze
Directions:

1. In the bowl of your stand mixer, dissolve yeast in warm water. Allow to stand about 5 minutes until creamy/foamy.
2. With paddle attachment beat 3 eggs, sugar, margarine (or butter), whole wheat flour, all purpose flour and oats into the yeast mixture. Or, if mixing by hand (ok, spoon), combine eggs and margarine/butter with yeast mixture until well mixed. Add flours and oats and mix until it becomes difficult to mix.
3. Once combined, switch to the dough hook and knead for 5 to 10 minutes until smooth and elastic, adding flour as/if needed. If kneading by hand, this should take about 10-12 minutes.
4. Form dough into a round, compact ball. Turn in oiled bowl, cover with a kitchen/tea towel. Let rise in warm area (I put it in the oven with the light on) until doubled, approx. 2 hours.
5. Once dough has doubled, punch down. Recover with towel, allow to rise again for an hour, but even 30 minutes will be fine if you’re in a hurry.
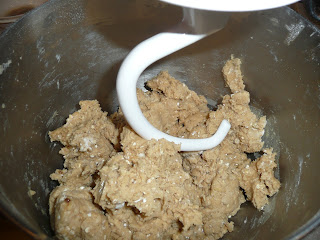
6. Punch the dough down again, divide in two.
7. Shape each half as desired (3, 4 or 6 strand braid, rolls, etc.). Place shaped loaves onto parchment covered baking trays. Cover with the towel and allow to rise another hour.
8. Preheat oven to 350 degrees.
9. Brush loaves with egg wash. (Sprinkle with vanilla sugar/sesame seeds/poppy seeds/other topping here if desired)
10. Bake 30 to 40 min. until the loaf sounds hollow when tapped on the bottom.
11. Transfer loaves to a wire rack to cool before serving.


Thursday, May 10, 2012

Lea's Napa Valley Inspired Granola

 This Granola recipe is my first try at creating something special for Lea.  As I looked over the ingredients she wanted me to incorporate I realized that many of the ingredients are produced in the Napa Valley.  It gave me inspiration to do something fun:

1 1/3 Cup Toasted Pecans
3 Cups Old Fashion Oats
1/2 Cup Flax Seed
1/2 tsp Coriander
1/2 Cup Brown Sugar
3/4 Cup Coconut
1/4 Cup Olive Oil
1/4 Cup Honey
1 Tbsp Maple Syrup
1 tsp. Vanilla
1/4 Cup White Wine
1 Cup Dried Cherries
1 Cup Mission Figs cut into fourths.
 Toast the pecans first for about 10 minutes. 
 Add olive oil, honey and vanilla into a bowl and microwave a minute
 Add oats, flax seed, coriander, brown sugar, coconut and the toasted pecans.  Mix together then add the oil mixture.  Lastly add the White Wine.  I used a dry Reisling.
 Spread the granola on a baking sheet and bake about 40 minutes.  Start by stirring every 10 minutes.  After 20 minutes stir every 5 minutes until toasty brown.
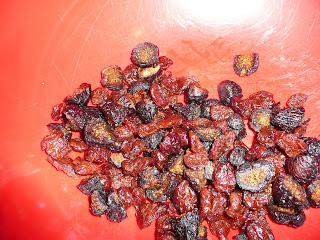
 In a seperate bowl add the cheeries and figs
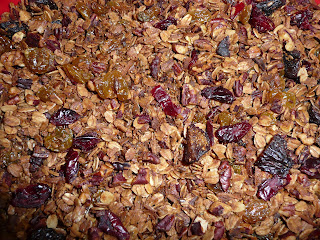
This is the granola out of the oven.  Once slighly cool add the granola to the dried fruit and mix together.

Fun facts that I learned while doing this Granola for Lea. 
90% of the worlds pecans come from the United States.  California is the 2nd largest producer next to Georgia
I used Olive Oil in this Granola as the Napa Valley is a great producer of Olives.
Mission Figs were first produced in San Diego California and are now grown in the Napa Valley.
Cherries are grown in the Napa Valley and some of the cherries make it into different cherry wines.
Napa Valley is most famous for it's wine production so in honor of the Napa Valley I added wine to the granola. 
Honey is produced in abundance in the Napa Valley.
When I was choosing a spice to add to the granola I researched where most spices are produced.  Few are produced in the United States.  Coriander is produced in the United State in cooler climates like Oregon and in Canada.  I decided to use the coriander in honor of a North American Granola homage.  The flax seeds are native to Canada where it is a large crop for that Country.